Monday, December 31, 2012

Miter Saw Station Upgrades

My NY shop wasn't perfect but over the 9 years I was there, I had enough time to get it outfitted to the point where it was very efficient.  My Boise shop is still a work in progress to that point.  One area that needed particular attention was the miter saw station.  I built a nice station in NY with a stationary saw position, 5' outfeed table, and a movable stop for repeatable cuts.  Unfortunately, I left that bench with the house when we moved.  The miter saw area in the new shop has been essentially temporary for the last 2 years (saw not secured to the table, no outfeed table, you get the picture...  Well, that all changed over this Christmas break.

I decided to follow a design I saw in Fine Woodworking magazine, where the saw sits in the middle and has infeed and outfeed tables on both sides.  Also on the agenda was a dust collection shroud in the back for a dedicated 4" run to my new Delta 50-760 dust collector.

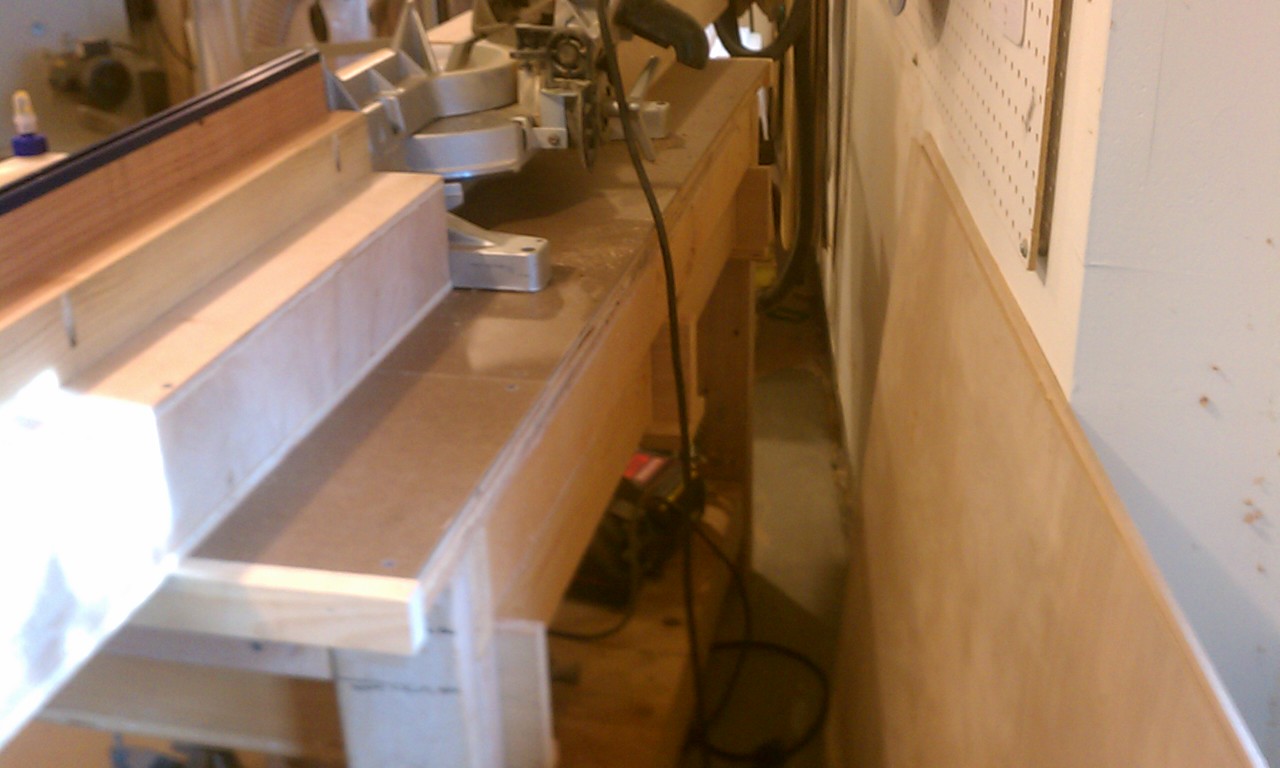
The bench the saw currently sits on is only 5' wide, so that made designing of the infeed/outfeed tables a challenge.  I knew a portion of each would be cantilevered, and kept that in mind when choosing a size.  Each extension is 3' in length and hangs off the table ~18" as shown in the photo below.  I built them as hollow boxes out of plywood using rabbit joints.  Each box is designed to be removable with the top surface screwed down with no glue.  Removing the top allows access to 4 screws that attach each extension table to the underlying bench.  Having worked in enough shops and knowing that a woodworker will often change his mind about things, I thought it best to have a backup plan!

I added a custom stop to the fence by attaching 2 pieces of 36" t-track from Woodcraft to the top and fabricating a custom glide that straddles the top of the fence.  A plastic knob with an attached bolt connects to a sliding t-bolt that rides in the track.  I can now move the stop to any position on the fence in a matter of seconds for repeatable cuts. 

Below are photos of the completed station with the dust shroud installed.  It does a great job of collecting just about every dust particle that shoots out the back of the saw.  The shroud also allows a 4" hose connection which maximizes the suction velocity from the dust collector.  The installed fitting on the back of my Dewalt DW705 is 1-1/2", which is essentially worthless.  My miter station will now be one of the cleanest areas of the shop, instead of one of the dustiest.


I also took this opportunity to fix a nagging problem with the workbench drawers.  I accidentally built them too long for the frame, so they extended beyond the back by about an inch.  Normally, this isn't a big deal.  However, when there's dust flying out the back of a miter saw above, the drawers will tend to be filled with sawdust!  Yeah, it really sucks when you open the drawer to get a tool and have to go digging around to find it.  The fix was relatively simple and involved cutting the back off the drawer to the correct dimension and reattaching it.  I unfortunately had to cut off some half-blind dovetails but oh well.  It is only a shop cabinet after all.   Below are before and after photos of the drawers.
 Before
and after...

Now that this project is done, I can focus once again on making jewelry boxes for my last 2 nieces.  I'm WAY overdue on getting these done.  Happy New Year everyone.

Saturday, December 29, 2012

Bar Project

It's been a very busy month and I've been wanting to post on several topics for over a month.  Now that I have some time off, I'm going to catch up with several all at once.

My buddy Derek bought a new house recently which has a nice built-in wet bar in the living room. Since it shared a wall with the garage Derek had an idea to run draft lines through the wall and install his draft towers directly on the bar top.  Sounded like a damn good idea to me so I took it as a project to help him out. 

Below is a photo of what we started with.  It's not the best photo but it's the only one I had.  The bar top and backsplash were covered in lovely white 1970's formica and the sink (covered by cardboard boxes in the photo) wasn't attached to the countertop.


The renovation plan included replacing the bar top and backsplash with maple and finishing it with a thick coat of epoxy so it looks like a commercial bar.  We decided to remove the formica backsplash but not the bar top since Derek wanted the job to get finished in less than a month...

I went with laminated maple strip flooring for the top and 3/4" soft maple to trim out the front edge and make a new backsplash.  The flooring was glued directly to the formica then wrapped with the maple boards to finish the carpentry. Holes were cut in the top to reinstall the sink and place the draft towers.  The beer lines were run under the counter and directly though the wall into the garage through a collar we added to Derek's kegerator. 

The epoxy proved to be a bit of a challenge since it doesn't flow like typical oil based finishes but after 2 coats (and quite a bit of sanding) it came out quite nice.  Below are two photos of the finished bar.  The epoxy ended up placing as 3/16" layer of high gloss clear protection over the maple.


Monday, December 17, 2012

Brewing News - Good and Bad...

First the bad.  I poured 10 gallons of beer down the sink this weekend.  Found out the oatmeal stout I brewed a month or so ago went horribly wrong.  It either got infected or was made with a bad pitch of yeast.  I re-pitched the 1056 cake from my last IPA (which turned out great) so I'm not quite sure where the snafu occurred.  The beer had a telltale medicinal taste to it, which points to a bacterial infection.  Regardless, that batch has been scratched from my memory forever and this is the last I will speak or think of it.  Besides one last point... I have made a decision to no longer harvest yeast for future use.  Despite my successes in the past with this practice, I'm come to the realization that I'm too busy (and too lazy) 

Now the good. The sour cherry batch came out fantastic!  The amount of tart cherry juice I added (24 oz per 5 gallons) tastes just right.  The beer is beginning to show more Brett flavor now as compared to the lacto tartness that came out first.  It will likely continue to change as it matures and as the bugs have more time to eat the cherry sugars.  However, I doubt the keg will be around long enough to document much more change.  Think I will start another batch soon since this one took 5 months to make!

Sunday, November 25, 2012

Oufitting the V-Strom, Part 1

Since buying my V-Strom, I've discovered an entire subculture of people devoted to these motorcycles and their ability to be customized.  Tons of valuable information can be found on the following forum-based websites:  Vstrom Riders International and Stromtroopers.

One of primary reasons I bought the V-Strom was its ability to carry a weekend's worth of gear and still handle reasonably well, unlike other super-heavy 2-wheeled RV's that are marketed as 'touring motorcycles.'  With it's factory installed luggage, my bike is already able to tour as-is but it would be a lot more comfortable and user-friendly with a few upgrades. This is where those forum websites and my engineer-self came together and hatched a plan.

My overall goals are two-fold:  1) Have safe access to my phone and other entertainment while riding; and 2) Be able to ride my bike in just about any weather (sans heavy rain and snow).   The forums noted above have tons of examples of other riders that have installed power outlets, gps units, bluetooth helmet speakers, heated grips and gear, etc. to help make the riding experience more utilitarian and comfortable.  

First step was to buy and install a fuse block that could serve as a power distribution center for running accessories.  Since factory-installed 12-volt power outlets only come on a select few motorcycles these days, the rest of us have to install them ourselves.  After reading many of the forums, I went with the Eastern Beaver PC-8.  It's relatively simple and the manufacturer provides an install kit taylor-made for my V-Strom.  And with it's 8 circuit capability, I figure I'll have ample room to run as many accessories as my little heart desires.

I followed the install instructions provided on the website and it went amazingly well.  Here's a few photos of my installed PC-8, which is installed under my seat.  The first is without the cover installed so you can see how the internals are wired.  What you can't see is the harness connector where I tapped into switched power under my gas tank using wires that control the turn signals. 


The orange wire is the main battery power which powers two "always on" circuits as well.  Most of my accessories will be switched so they won't drain the battery when the motorcycle isn't running.


And here's a photo of the finished install.  The whole process took a little over an hour.  And the best part?  All of the bike's electrical functions still work!  Whoot!  My first connection (wires at the left of the PC-8) is for my battery tender cable.  Next on my list are Powerlet 12-volt power outlets (ASO-001 and PSO-002) to run my phone and a bitchin' pair of heated glove liners for cold weather riding.  :-D.

Cheers!

Monday, November 12, 2012

I have finally made it to the Promised Land!

More Kegs!!

Saw a post on the brew club forum yesterday that a friend was getting out of brewing.  Despite my sadness that a friend would no longer be brewing, I had the good fortune of purchasing some of his equipment that he no longer wanted.  I picked up 6 used 5-gal ball-lock corny kegs at a very good price.  For anyone famliar with homebrewing, finding used corny kegs in decent condition is getting harder and harder since Pepsi has all but sold their past inventories.  I now have 12 kegs total (10- ball-lock & 2- pin-lock), which should satisfy my brewing needs forever.  I'm thinking of selling the pin-locks though since it's a hassle to have full sets of each type of dispensing hardware.

I also brewed my Oatmeal Stout again yesterday.  Had a great brewday And picked up 4 gravity points due to increased efficiency in my sparge (77.5% for 1.064 OG).  Decided to use whole Delta hops in this beer since the English Bitter recipe with them turned out so well.  This beer should be ready by Thanksgiving, just in time for our dinner guests to try.

Wednesday, November 7, 2012

So much for my optimism

It became abundantly clear last night around 9 PM that Obama was going to be re-elected.  However troubling that fact was to me, it still wasn't as nearly as important as why he was being re-elected.  He and his campaign staff pulled off a masterful job of bait & switch, completely convincing millions of Americans that Romney wasn't likeable enough nor trustworthy enough to be president.  What what what?????  The Republicans also failed to realize (again) that you need more than white men to elect presidents these days. 


One of my co-workers summed it up nicely this morning.  If you're not a likeable guy, you have no chance of ever becoming president.  Last night proved this point.  Our gullible, under-educated electorate would rather have a clinically arrogant rock-star than a solid, results-oriented businessman.  Unfortunately, these same people likely won't bear the brunt of the impact his incompetence will continue to bring over the next 4 years.

Now I'm willing to entertain the possibility that I will be pleasantly surprised over the next fours.  Please pardon me while I hold my breath...

Tuesday, November 6, 2012

Election Nonsense

I am very happy that Election Day is finally here.  In a few more hours, we will no longer be subjected to countless inane political commercials broadcast on every form of media available to the campaigns as well as those "non-partisan" (sic) 501(c)(3)'s.

Those that know me also know that I am a fiscal conservative who typically votes Republican in national and state elections.  That is, unless the candidate is an idiot (paging Todd Akin), clueless (Sarah Palin), or entirely out of their freaking mind (Michelle Bachmann).  There are exceptions to every rule.  This election is a fairly easy one for me since I honestly believe that Gov. Romney is far more qualified, prepared, and able to get the economy back on track and create jobs.  What's not being said in this election is something everyone already knows...when unemployment is low and the stock market is doing well, no one really cares all that much about funding for PBS, Planned Parenthood, or even abortion for that matter.  For me, solve the big problem and the little ones have a way of taking care of themselves.

What's difficult is trying to make that point to democrats or socially-conscious liberals.  I boil it down to big-picture vs. small picture politics.  Big picture equals jobs, low unemployment, and an economy where where it's possible to make more than $0.02 a year in your savings account.  Unfortunately, we're a long ways off from achieving any of those goals.

As a final note: I attended an open enrollment meeting yesterday to discuss my company's health care plan for 2013.  Like clockwork, our premiums are going up by 100%.  That's right, 2013 will cost TWICE AS MUCH as what we paid in 2012.  Why you may ask?  Well, it's called the Affordable Care Act of 2011!  Ironically, the only thing "affordable" about it is for people who weren't paying anything for health care in the first place.  I particularly enjoyed President Obama's claim that "if you like your current health plan, you can keep it!"  What he didn't say was how much it's going to cost you & your employer for the privilege...

Happy Voting America!  I hope I have good tidings to share in the morning.

Monday, November 5, 2012

Jesus...where to start???

It's been 6 months since my last post.  I suck.  I know.  Getting past all that, what has happened since the last post?
  1. NHC (which was fucking awesome, BTW).  I'm planning to go to Philly next year if at all possible.
  2. Lots of work travel (Canada (twice), California, Missouri (twice), Las Vegas (twice), and Chicago.
  3. I finally bought a motorcycle.  Hell Yeah!!  It's only been 20 years in the making but I finally own one again.  And it rules.  Bought a Suzuki DL1000 V-Strom Adventure.  Has everything I was looking for in a bike: fun and easy to ride, plenty of power, installed luggage, and unlimited customizability.  I'm as happy as a slinky on an escalator.  :-D
  4. The Red Sox had their worst season in 50+ years.  Not talking anymore about that but at least they fired Bobby Valentine, which was perhaps the worst managerial hire in 50+ years as well.
  5. A new nephew was born.  Welcome Jackson Brantley Harris!  Can't wait to see you at Christmas.
  And now I offer my obligatory pledge to post more often.  We'll see where that goes...

Friday, May 11, 2012

Portable Bar for NHC

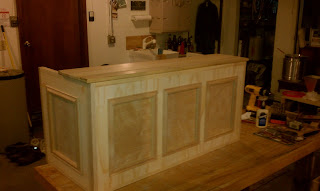
The SRB guys thought it would be cool to have a decorative cabinet to surround the club jockey box for NHC in Seattle.  Being the sucker I am, I volunteered to take the lead on it and build one.  I had 3 basic goals for the design:  1.  It should look like a miniature bar from the outside, 2. It should be somewhat portable, and 3. It needed to support pouring of beer from the jockey box.  Sounds pretty simple, huh?

My design is a 3-sided frame & panel cabinet with hinges between the panels to allow the cabinet to be quickly broken down for transport and storage.  The front frame has 3 equally spaced panels and each side frame has a single panel.  The front and side panels are connected with a piano hinge in each inside corner.

To save some money, I cut the rail and stile pieces from 5/8" plywood and used 1/4" oak plywood for the panel inserts.  I used off the cap moulding to wrap the insides of the panels to add some detail and dress up the bar a bit.  All of the assembled panels were wrapped in 1" white ash to hide the plywood edges.  The top is also white ash which is segmented into 2 pieces to allow it also to be folded down to capture the sides.  The folded top will have a hook and loop latch installed to keep the sides from opening up during transport.
 
Here's a few photos of the assembled bar without finish applied.  I'm planning to apply a mahogany stain/polyurethane combination finish to give it an old tavern look.  I'll post a few photos of the finished bar when it's done. Cheers!

Front of the Portable Bar

 Back view of the bar with the jockey box installed

View of the folded bar ready for transport.

Wednesday, March 28, 2012

NHC Preps

I'm registered for the National Homebrewer's Conference this year for the first time.  I've been wanting to go for years and finally get the chance since it's coming to Seattle.  Several of my buddies in the Snake River Brewer's Club are also going to so we decided to participate in Club Night, which is essentially a homebrew beer festival with each club pouring their creations for 1600 of their closest friends... 

To get ready for Club Night, I'm building a 6-tap jockey box from a 100-qt marine cooler and a cold plate that a few club members donated.   Here's a few shots of the progress made thus far  (Thanks to HomeBrewStuff.com for supplying all of the dispensing hardware, tubing, and accessories):


All that's left is installation of the supply tubing from the kegs and we'll be good to go.  It's also going to have a decorative wood cabinet that wraps around the front and sides for the impression of a portable bar.  I'm also building that.  It will have have a frame and panel design on all three sides with hinges so it van be broken down for easy transport and storage.  I'll post some photos up once I get some of the woodworking done.  We're gonna represent in Seattle!

Thursday, February 16, 2012

Yarn Swift for Beth

I got the idea to build Beth  a new swift when we went to Portland last summer and saw a vendor who was selling tabletop models that broke down for easy storage.  The design was rather simple and I knew I could make one for next to nothing.  After hearing Beth swearing about her current swift was a piece of crap, I decided to start this project.  I found some notes posted on the web from another woodworker that had the same idea and started the woodworking.

I built it out of 3/4" ash left over from the bookcases I blogged about in the post below.  These swifts don't require much wood to make (2 pcs 3"x24" and 2 pcs 1"x36"), so the whole project goes fairly quickly.  The toughest part of the project is getting the center holes aligned and drilled so it will spin true.  The prototype isn'rt perfectly centered but is close enough to spin effortlessly when Beth has a skein of yarn on it.

The design is nearly identical to the link above, with all parts able to be disassembled for easier storage.  The base legs and spreader arms go together using bridal joints with the whole assemble held together with a 4-1/2" bolt, a few washers, and a plastic knob.  I added a jam nut under the plastic knob to prevent too much friction being added from over-tightening.  The center hole of the spreader arms has a brass sleeve inserted to prevent run-out in the drilled hole.  Below are photos of the parts and the assembled swift when completed.  It takes less than a minute to assemble.  I finished it with 3 coats of a satin wiping varnish. The pegs were left bare wood to avoid staining or marring the yarn.  I already have a request from one of Beth's fellow knitters for another one!